November 16, 2003
Russel Kneebone Russell Kneebone is an IBM iSeries programmer now working in the US after growing up in Australia and living in the UK in the early 90s. He has used OS/2 since 1995 and eComStation since version 1.0
If you have a comment about the content of this article, please feel free to vent in the OS/2 e-Zine discussion forums.
There is also a Printer Friendly version of this page.
|
Previous Article |
|
Next Article |

Installing the VisualAge UML Designer
The VisualAge UML Designer is distributed as a "goodie" for IBM's VisualAge Smalltalk, and is available for the Windows and OS/2 client components of VAST. In this article it is assumed that a non-programmer has gone through the stand-alone install of VisualAge Smalltalk 6.01 (now that it is free for non-commercial use) and downloaded the UML Designer .ZIP file specifically to try the modeling tool. This zip file may be found by pointing your browser at IBM Software, taking the "Support & downloads" link, then the "Downloads & Drivers" link and entering UML Designer as the search term. It should return as the first matching link.Installation
The page containing the install instructions for this goodie are nearly as daunting and incomprehensible as Smalltalk itself to a non-programmer, so let's take them one by one. However, before we start it might be advisable to take a copy of the abt.icx file from the image601 directory in case the installation fails in some way.Those steps:
-
Unzip the downloaded file into the VAST root directory
By the phrase "VAST root directory" IBM means the d:\ibmvast\vast60 or wherever you chose as a target on the original install. The goodies subdirectory should be at the same level as the image601 directory from which you were just advised to copy the image. -
Make the <vast>\goodies\UMLDesigner\setup directory the current
directory.
In our previous example this would be d:\ibmvast\vast60\goodies\UMLDesigner\setup -
Run the appropriate platform-specific setup file, setup_w.bat for
Windows or setup_o.cmd for OS/2.
Provided step 1 was performed correctly two messages detailing a number of files copied should result from this command. This command sets up resources for the UML Designer menus, menu items and diagrams -
Ensure that the following config maps have been loaded into the VAST development image
If not, load them in the following order:
a. OTIML SGML Support
b. AbtXmlPrimitive
c. ENVY/Image Print Previewer
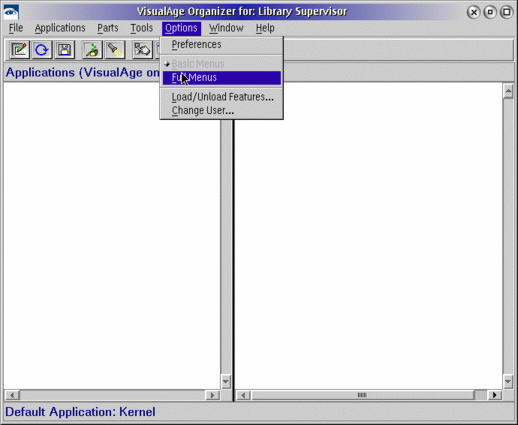
d. ENVY/Image Drag And DropThis is where the instructions start to assume a great deal more experience with VAST than we actually have. For a start, go to the Options menu as shown below and choose Full menus.
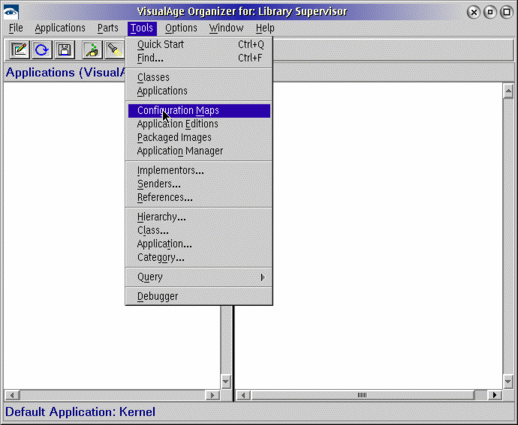
This makes the Configuration maps menu item of the Tools menu visible, as shown here.
The Configuration Maps browser is typical of the three column browsers offered throughout VAST. Choosing an item from the list on the left brings up a list in the middle column, and choosing an element from that list brings up items in the right column. In the context of this browser, a configuration map is loaded if an asterisk precedes the application name in the right column. This will not be the case for three of the four configuration maps listed above. To load the map right-click on a selected application and take the load option as shown.
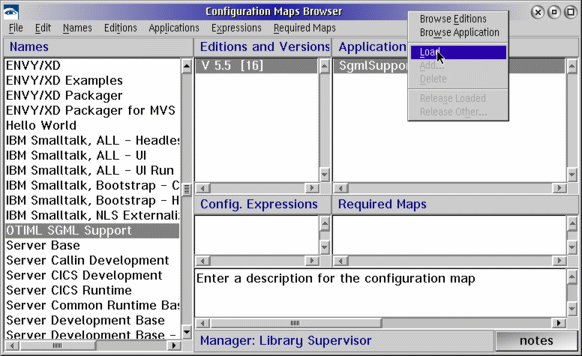
It does no harm to load the last (already loaded) item as well.
-
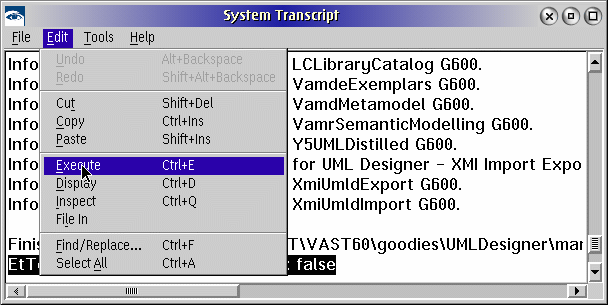
Swipe and execute the following code from a VAST workspace:
EtTools moveAllRequiredMapsToo: trueHere we see the fact that the tool is written in Smalltalk and is being interpreted from its image coming into play. The System Transcript window is (unexpectedly) able to edit its contents, so the easiest thing to do is position to the end of the last message logged, press enter and then paste the line shown into that window. Then highlight this new line in the System Transcript window and choose execute from the Edit menu as shown.
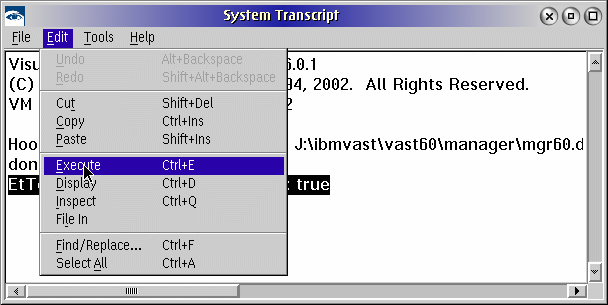
This step ensures that dependencies are handled automatically on the next import.
-
Import the 'Goodies - UML Designer' configuration map from the
<vast>\goodies\UMLDesigner\manager\uml.dat file.
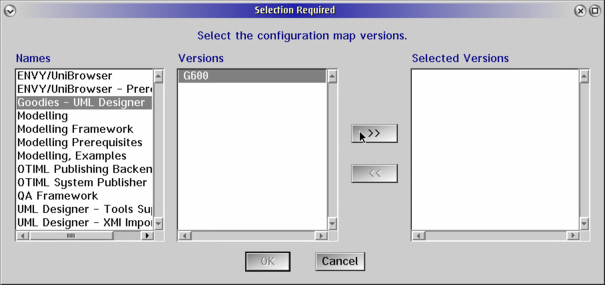
From the Names menu on the Configuration Maps browser take the Import option as shown and navigate to the manager directory as described. There will only be one .dat file in this directory.
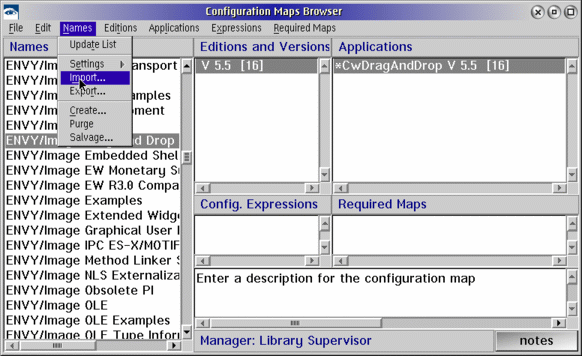
The 'Goodies - UML Designer' configuration map should be selectable.
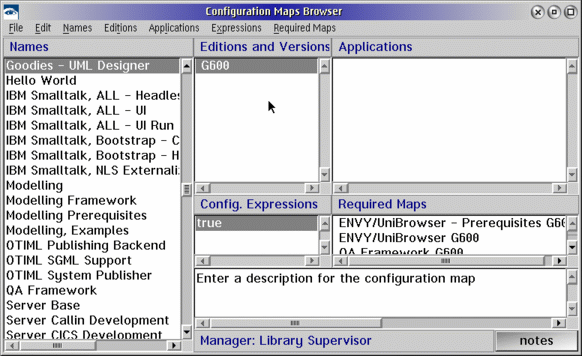
After much scrolling of the system transcript window the following screen should appear:
-
Swipe and execute the following code from a VAST workspace:
EtTools moveAllRequiredMapsToo: falseSee step 5 for the procedures to undo the automatic collection of dependencies on import.
-
Load the "Goodie - UML Designer" config map with required maps.
At this point highlighting the imported goody in the browser shows applications ready to be loaded in the pane immediately beneath the right column of the browser. Select, right-click and Load as shown.

There will be a message halfway through working this list that can be answered with a Yes.

After these steps it is best to exit VAST, saving the image on exit of course, and optionally taking another copy of the image (abt.icx) to give a clean UML Designer baseline image.
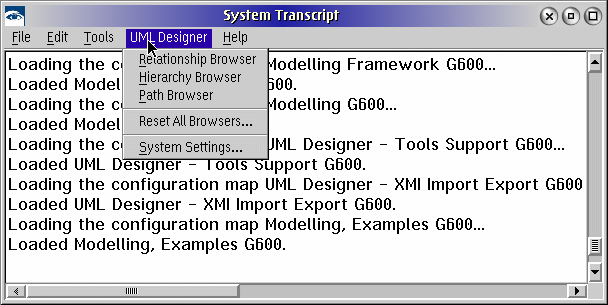
If you re-enter VAST as this point you will see the new menu on the System Transcript window and the options shown.
At this point it is probably best to consult the IBM Redbook
Using VisualAge UML Designer (SG244997).
Have fun! But just as a primer, to whet your appetite, here are a few screenshots.
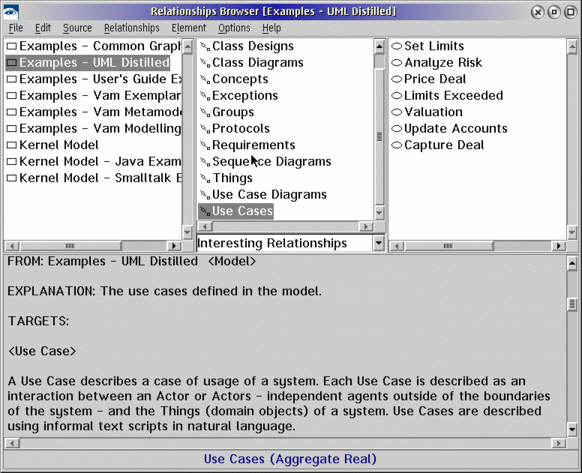
The relationship browser is the heart of UML Designer. Shown below is that browser listing some of the examples shipped with the tool.
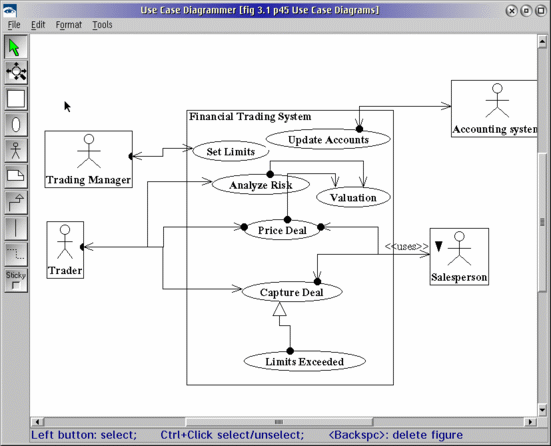
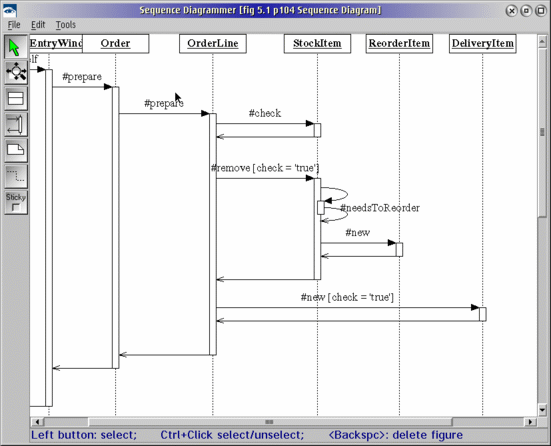
Visually, the diagramming tools represent the most impressive screenshots.
The use case diagram tool:
The sequence diagram tool:
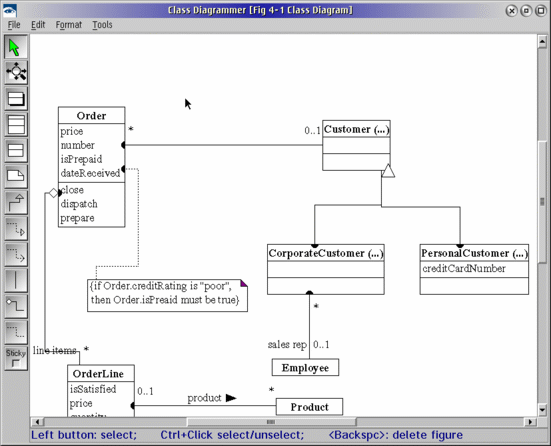
And the class diagram tool:
The next installment will attempt to take you through a typical use-case and highlight the advantages offered by this tool in the requirements capture stage of development.
|
Previous Article |
|
Next Article |