
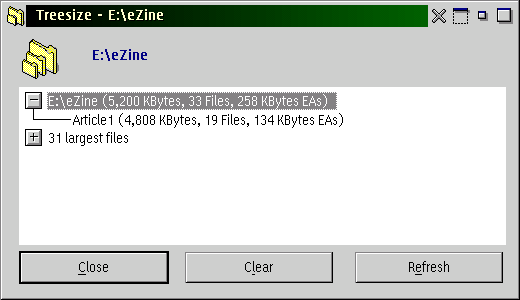
In my work I generate many image files either by scanning electrophoretic gels or from digital cameras on microscopes. In science the TIFF file format is used because there is no loss of information unlike the JPEG format. The problem is that TIFF files are often quite large and often can not be emailed because they are too large for the email buffer. So it is often useful to obtain the size of a file quickly. To obtain the file size under OS/2 when you mouse button 2 click on a file and bring up the properties notebook, you go to the File tab. But in order to see the file size you would have to go to page two. (Of course you could also open up a Details view of the folder.) In eCS 1.1 the file tab has been redesigned to one very helpful page.
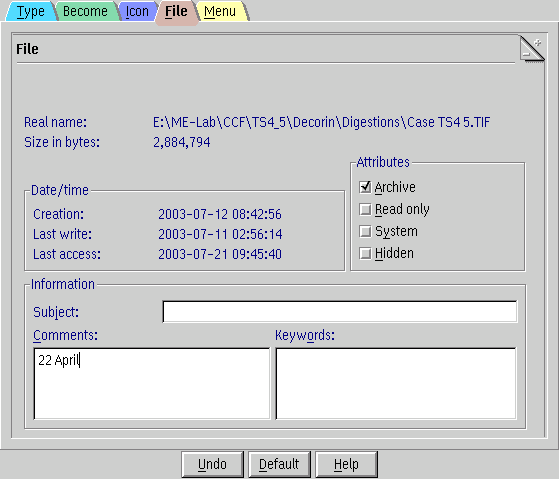
As you can see I am making use of the extended attributes and adding dates to some of my files. After scanning gels (which is not the same day they were run), I am now typing in the dates that correspond to when the experiment was done so I can quickly find the originals in my research notebook. Yes, OS/2 is a great operating system.
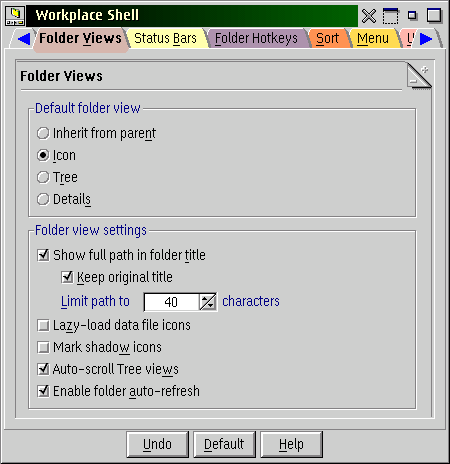
Another new change I have found in eCS 1.1 is in the folder titles. We have always had the ability to change backgrounds and color of the window titlebar (see below) but now folders can show the full path in the titlebar. This is helpful is you are several layers of folders down and can't quite remember the path you took to get there. You will find this setting by double clicking on the Workplace Shell icon in the System Setup folder. Look at the bottom half under the Folder view settings.
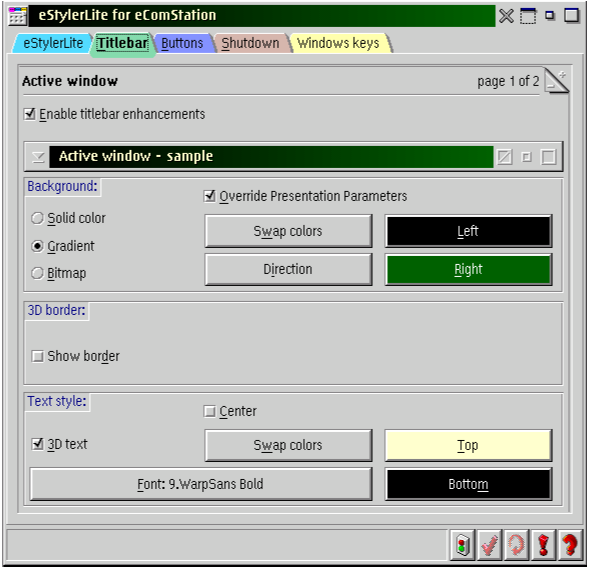
Since eCS 1.0 eStyler has been bundled. I include a short bit about it for OS/2
users who have not purchased eCS. eStyler Preferences is found in the
Appearance folder which is in the System Setup folder. First you can modify
some settings for eStyler itself (not pictured). Next you can select the colors
for the titlebars for active windows (pictured) and inactive windows (not pictured).
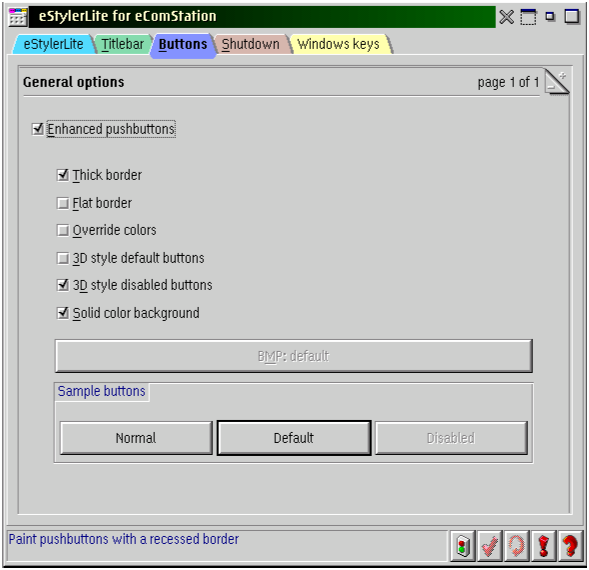
Next you can change how buttons look.
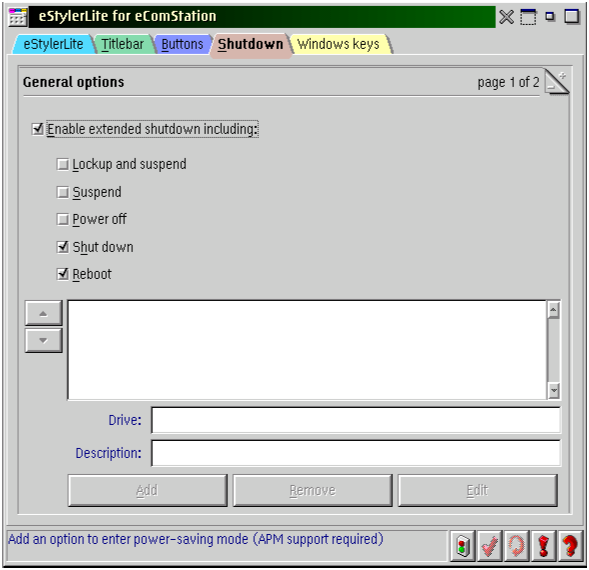
Thirdly you can set shutdown options. When you initiate a shutdown from the
Desktop a window pops up with the choices you have already selected in
eStylerLite. This really helps with rebooting if you have to change screen
resolutions often. On the second shutdown page (not shown) you can also set
programs to be run on shutdown.
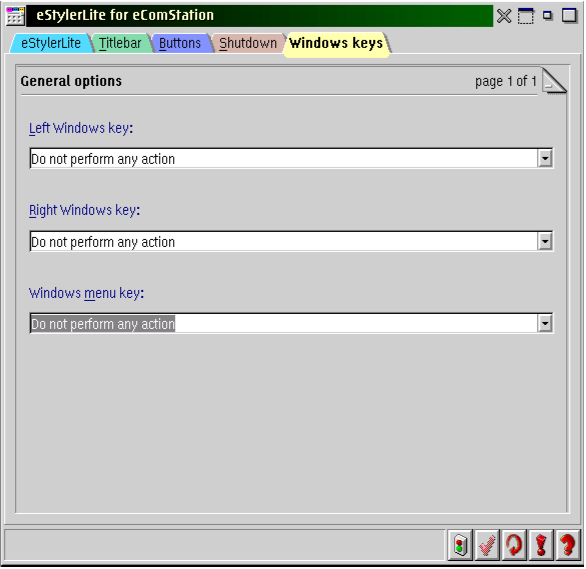
Finally on the last page you can set functions for those stupid Windows keys on
your keyboard. It can be a challenge to find 101 key keyboards any more so this can be quite useful.
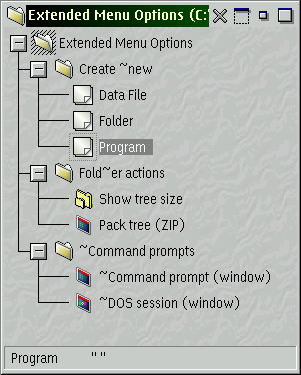
On the standard eCS install there are three new entries on the mouse button 2 menu. The first is Create new. From this option there are the three choices of; Data file, Folder, and Program.
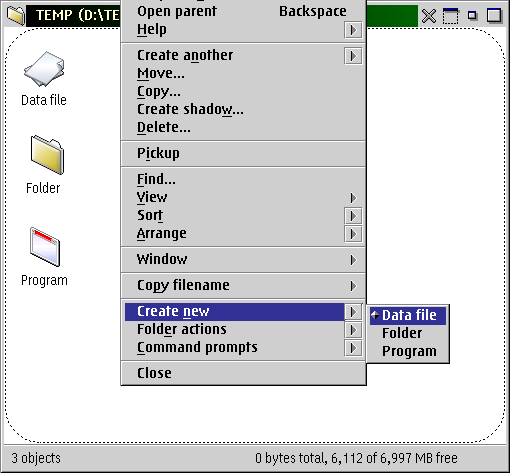
Choosing any one of these will create the appropriate object in the folder you mouse button 2 clicked on. Serenity Systems has not changed the normal menu, they have just added to it. So you can still choose Create another from the menu to create a new folder. If you chose the older Create another you get a pop up dialogue asking for the New name and what folder you want it under. From my experience if I have opened several folders in different orders the dialogue often picks the incorrect folder. With the new Create new option, you get an actual icon in the folder you clicked on (no dialogue) and the icon's title is ready to be changed. This action behaves like Windows which is actually a nice implementation. But as we are used to with OS/2 you are not tied to one way but have choices.
Under the second new menu choice is Folder actions. Here there are two submenu choices the first is Show tree size (figure below). The second submenu choice is Pack tree (ZIP). I will discuss this function in the next section.
The final and third new menu addition is Command prompts. As you would expect this enables you to open a command prompt window. The convenience here is that the command prompt is already positioned to the directory that you issued the menu choice from. There are two submenu choices for command prompts. The first selection is called Command prompt (window) which opens up an OS/2 command prompt window. The second option is DOS session (window) which as you have already guessed opens up a DOS command line window. While I don't make use of this feature often, I find it very helpful to have it around so I don't have to change drives or type my way down through directories.
If you want to change the options eCS 1.1 lets you modify. Under your System setup is an Appearance folder. In that folder there is an Extended Menu Options folder. Double clicking on that folder opens up a window with the Tree view of the new menu additions.
Adding a new menu item is as simple as dragging an object and dropping it where you want it. For example if you want a Command Prompt (Full Screen) as a menu option, Open the Command Prompts folder and drag the Command Prompt (Full Screen) to the Extended Menu Options folder. But be careful here. At least when I tried dragging one of my command prompts over, eCS did not make a Shadow of it, but instead moved the icon to the Extended Menu Options folder. Now if I delete that prompt icon from the menu list, it is gone. Dragging a template works slightly better, in that you don't lose your original template icon. But a new template is not created in the Extended Menu Options as I would have expected. Instead, as I should have expected you get the object of the template you drug over. For example if you want a WAVAudio item on the menu and you drag and drop the WAVAudio.WAV template to the Extended Menu Options folder you get a WAVAudio.WAV item and not a template. If you want a template in the menu options, it is easily solved. Just open the Properties menu choice for the new item and select the icon tab. On that page check the Template box and you will have a template item on your menu. Of course if you remember to hold down the Shift key as you drop and drag a template the item stays as a template but you end up moving the original out of the Templates folder. Holding down the Shift and Control buttons as you drag and drop creates a shadow in the Extended Menu Options. The best way to go is to drag and drop while holding down the Control key. This way you make a copy and your original stays where it was.
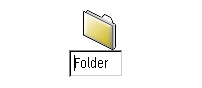
Changing the order can be challenging. I wished the Create Folder was the first choice in the Create new menu option. I create many more folders than new Data Files. You just can't drag items around the tree diagram to change the order. I ended up dragging and dropping in new templates in the correct order and deleting the original ones to get the Folder template at the top. If you go for it on your own be careful but you can get there. I certainly appreciated the Trash Can this time and the ability to restore deleted items.
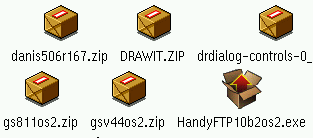
One of the most popular features of Stardock's Object Desktop enhancement was the way it handled zip files. Since, so many programs for OS/2 are available only as downloaded zip files, having a built in unzip program is especially helpful. eCS 1.1 comes bundled with Info-ZIP's unzip program and with a gui front end, well sort of. First of all, files with the .zip extension get a new boxed icon. As opposed to a warpin install which has an opened box.
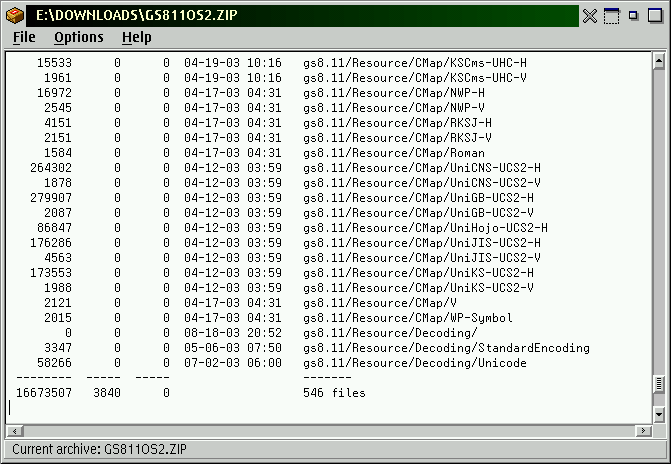
Double clicking on a zip file opens up a window which contains a text list of all the files in the zip archive listed alphabetically. The program has an icon located in the Utilities folder and named Archive Viewer. Interestingly though, after installing eCS 1.1 not all my zip files were associated with the Archive viewer. No problem double clicking on the Archive viewer icon opens up a window from which you can pull down the file menu and choose file open. Then select the file from the standard file open dialog window and you see the zip file's contents.
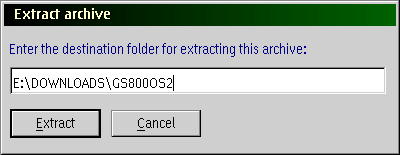
Even though you now see all the files in the zip archive it is still not unzipped. You must then either pull down the File menu and chose Extract archive or press control E. You then get a window where you can enter the destination folder for the zip file's contents. The dialog is automatically filled in with the drive and directory that the zip file is located in. It then also puts in a directory named after the zip file. You can certainly overwrite the default but there is no browse button to click your way to another directory.
While not as OS/2ish as in Object Desktop it is nice to see a gui unzip preinstalled. I suspect this will aid new comers to eCS. As OS/2 users would expect you do not have to stay with the bundled interface. Stardock's Object Desktop still installs and can replace the Archive Viewer with its own unzip interface. You still have choices with eCS as all OS/2 users would expect.
I must confess at first I missed the way to create zip files, [Ed: OS/2 and eCS users may want to check out eZIP, it may be a great replacement]. but I did find that eCS 1.1 does come with a way to create a zip file without having to resort to a command line interface. What you do first is create a folder. Next you drag and drop all the files you want zipped up into the new folder. Then you mouse button two click on the folder and choose the Folder actions -> Pack tree (ZIP). This briefly opens up a command window and lists all the files in the folder. It automatically closes and in the parent directory is a zip file with the same name as the folder you just zipped up. Except if you have spaces in the folder name the zip archive is only named with the first word in the folder name. While not a nice as Object Desktop in that you can not just tear off a template and drop files into the new zip file, it is nice to see the capability bundled with the default operating system install.
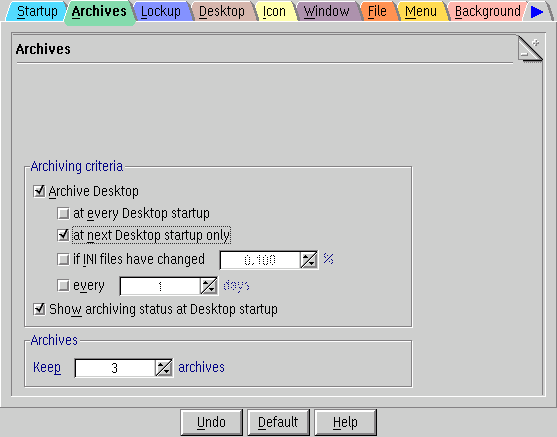
There are some very important files needed by OS/2. If something happens to one of these files your system behaves quite poorly if at all. One of the options we have had in OS/2 is to make an archive of these important files so that you can if needed replace them. The difficulty is that you would have to remember to set your desktop to archive and then remember to set it to not archive afterwards. Otherwise it would archive on every start and take the increased time required. The original keeps three copies and then starts deleting the oldest one. While very helpful, it could be improved. And guess what, it is improved in eCS 1.1. Under the archives tab you can set to archive at every start, at the next start, after a certain percentage of the ini files have changed, or after so many days. A very useful feature. I will be making extensive use of this.
Another new addition to eCS 1.1 is the ePager. This is a little rectangular window found near the bottom of your screen. What it enables you to have is multiple desktops. A similar feature was also found in Stardock's Object Desktop product. What you can have is one screen with an internet browser and email client open and with a mouse click be on another desktop with work applications open and running. It is a way to keep several applications running without cluttering up your desktop.
The Icon page in the properties notebook has changed as well. You can still drag icons into the Current icon window to change the icon image as expected. In addition to changing the layout of the page, eCS 1.1 now includes the Object hotkey: setting. Here you can designate a key or combination of keys to simulate a mouse double click. Don't forget to push the Set button and entering the key combination you want to use. I especially use this for the CD player.
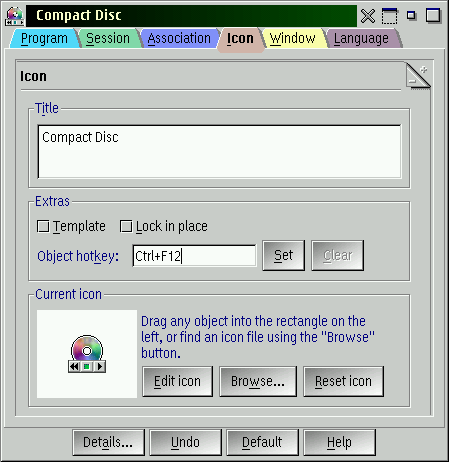
Afterwards it does not matter what program has the focus, when you press the key combination you designated for the icon, eCS will start the program. In my opinion, this is a better integration than Object Desktop's Keyboard LaunchPad. By the way, if you have Stardock's Keyboard LaunchPad installed and a key combination assigned to an object, you will not be able to designate the same key combination in the new Object hotkey in eCS 1.1 (very nice).
If you are using OS/2, there are many nice changes to the dialog boxes. Since I have had Dialog Enhancer for several years, I can't remember what the OS/2 dialog boxes looked like. So I will offer no specific comments here. There are a few things I know I have not covered like the USB Resource Manager in the System Setup, the Internet Assistant for eComStation, and the Fonts folder. Maybe another eCS 1.1 user will stand in the gap here and help me out.
That's it for me. If you have not upgraded, I hope you enjoyed these brief peeks at eCS 1.1 from the users' view. If you have upgraded, hopefully I uncovered a thing or two you missed. Thanks for reading.
This article is courtesy of www.os2ezine.com. You can view it online at http://www.os2ezine.com/20031016/page_2.html.